

If you are looking for a thrilling challenge in Minecraft, you may consider trying to get a Beacon in the game. It’s one of the rarest and hardest items to get in Minecraft because it requires quite a lot of expensive items, including the Nether Star.
The trek to create and own a Beacon in Minecraft requires you to embark on a lot of rip-roaring adventures such as spawning and killing the Wither, gathering tons of iron, and a lot more, which is why it is also known as the epitome of bravery and prestige in the game.

Owning a Beacon allows you to gain a wide range of power-ups such as faster movement and mining speed, health regeneration ability, and more. It can also be used as a way to mark your preferred locations in the game and identify them from miles away.
Unfortunately, not even Minecraft itself cares to explain how Beacons are activated and used. That’s why we’ve created this guide to help you understand everything about this unique item in Minecraft, including how to craft it and what you can do with it.
How To Make and Activate a Beacon in Minecraft?
While the crafting recipe for the Beacon is relatively simple, the real challenge exists in finding the materials required for this recipe. Moreover, even after making a Beacon, a platform is required to make it work. Here’s the complete process, from crafting to activation, step-by-step:
Crafting The Beacon
Here’s what you need to do to craft the Beacon:
Step 1: Identify the Layout
At its bare minimum, a Beacon is essentially a one-block high structure that consists of at least three iron, gold, diamond, or Netherite blocks. The unit itself is placed on top of this structure, making the Beacon activated and functional.

You can even increase the power of your Beacon by layering more such structures to make it three, five, or even seven blocks higher. However, it’s a very tedious process as even making the one-block high structure requires you to have at least 81 iron ingots available.
Step 2: Collect The Required Materials
Crafting a Beacon requires you to have the following items available in your inventory:
Iron Ores (x81)
Before you indulge yourself in finding iron, make sure you have at least a set of wood and stone tools, particularly several pickaxes, in your inventory. Then, to locate the iron, dig straight down into the surface until you make past the dirt and find cobblestone.
After you’ve dug deep enough, begin mining your way horizontally, and be sure to use torches, signs, and ladders wherever they make sense to make your way in and out of the mine easily. Eventually, you’ll be able to locate some iron ore during the process.

Iron ores have orange spots and can only be mined with stone tools or better. If you attempt to mine iron ore with wooden tools, it won’t yield anything at all. You can also use gold, diamonds, or emeralds in place of iron, but they are far too rare to find as compared to the former.
Obsidian (x3)
To gather obsidian in the simplest way possible, you need to have a diamond pickaxe and a water bucket. Once you have acquired these two items, you have to find a source of lava in your generated world. You can try finding caves to locate ample lava pools with ease.
Once you’ve found a lava source, spawn the water bucket in your Hotbar and pour it into the lava. As soon as you do it, the water will start covering the lava and transform it into obsidian. If the lava pool is quite big, some parts of it will not transform.

After transforming the lava into obsidian, you’ll need to place a diamond or nephrite sword in your Hotbar to mine the obsidian. If you try to mine obsidian with any other tool, not only will it take considerably longer to break, but also, no loot will be dropped.
Sand (x5)
Sand is by far the easiest material to find for this recipe, which will be used to make glass for the Beacon. The sand spawns in most of the biomes in the overworld, from plains to forests, to swamps, to tundra, as long as it has four-block-deep layers.

Nether Star
The Nether Star is undoubtedly the most difficult and rarest item to acquire in Minecraft. There’s only one way to obtain it – by killing one of the strongest mobs in the game, the Wither. However, this mob doesn’t spawn naturally, and you’ll have to summon it in your game.
To spawn a Wither, you have to gather three wither skulls and four soul sand blocks. Both of these items can be found in the Nether by killing Wither Skeletons and mining four blocks deep respectively. Soul sand can also be found in ether wart rooms of the Nether fortress.

As soon as you summon a Wither, it will cause a massive explosion, destroying everything in its way. A simple way to kill a Wither with ease is by trapping it in Bedrock blocks and killing it, for which you can summon the Wither directly underneath the Bedrock fountain on the End dimension.
Once you kill the Wither, it will drop the Nether Star that you can then pick and add to your inventory.
Fuel
A source of fuel is required to smelt the sand and iron ores that we collected earlier to produce glass and iron ingots respectively. Both wood planks and coal fit the bill for the process, and you can use a lava bucket, too, if that seems easier to you.
Step 3: Smelt Iron Ore
After you’ve acquired all the required materials to build the Beacon, you have to place a furnace and access it by clicking on it. In the furnace menu, place all the 81 ores or iron in the topmost square and add a source of fuel at the bottom.

In a while, all your 81 iron ores will be converted into iron ingots that you can then add to your inventory. Make sure you have enough fuel to smelt all the iron ores you’ve collected earlier in the game to be able to acquire the required iron ingots.
Step 4: Smelt The Sand
Once you’ve created the required iron ingots, it’s now time to make glass for the Beacon. For this, you have to place the sand blocks in the furnace along with the fuel, just like you did for the iron ingots. This time the output produced will be glass, so make sure you add it to your inventory.

Step 5: Access The Crafting Table
As soon as you have both the iron ingots and glass, you then have to place your crafting table at your preferred location and then click on it to access the crafting grid. This is where we’ll be making the rest of the required materials as well as the final product.
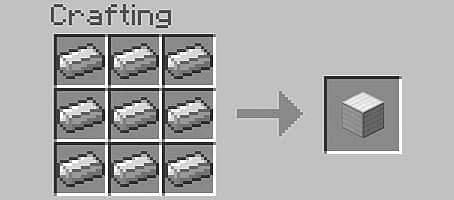
Step 6: Craft Iron Blocks
In the crafting grid, you have to place nine iron bars in each grid box to acquire a stack of nine iron blocks. These iron blocks will be required in the later part of the tutorial when we’ll be preparing the base for the Beacon.
Step 7: Craft The Beacon Unit
That’s where the fun part begins – now, when we have collected all the required materials and made the byproducts as well, it’s time to craft the Beacon itself. Launch the crafting grid of the crafting table once again and start by placing a block of obsidian on each box of the bottom grid.

Then, place the Nether Star in the middle of the grid, followed by placing glasses in the remaining grids. This will yield a Beacon in the output grid that you can then transfer to your inventory by clicking and dragging it.
Building The Tower
Now when you have crafted the Beacon successfully, it’s time to activate it by making a tower for it. Here’s how you can do it:
Step 1: Locate A Suitable Place
Before you start building a tower to activate your Beacon, you have to find a suitable place to start with. As a Beacon provides you with ranged benefits, you should consider making a base for it somewhere you can make the most out of it, preferably close to your base.
Step 2: Place Iron Blocks
Once you’ve found a suitable flat surface for the tower, make three rows by placing iron blocks on the ground to make a three-by-three structure with a total of nine iron blocks. Now you’ve created the base for your Beacon with the least power.
Step 3: Place The Beacon
After successfully creating the base for your Beacon, it’s now time to place it. To do this, select the Beacon in your Hotbar and position it directly in the middle of the iron block structure. If done the right way, the Beacon should emit a beam of light into space immediately.
Step 4: Add More Layers
We’re almost done with our Beacon at this point. Now, if you want to increase the power of your Beacon, you have to add more layers to the unit. You may consider adding a five-by-five layer consisting of 25 blocks, a seven-by-seven layer consisting of 49 blocks, and more.
However, keep in mind that you can’t go above nine-by-nine layers as it is the maximum capacity for the beacon to work. Therefore, depending on your requirements and willingness to mine a considerably large amount of iron ores, make a structure that matches your needs.
Adding Preferred Effects
Now that you have successfully made a Beacon and activated it, you can add your required effects to it and enjoy the benefits it provides. Here’s how you can add your preferred status effects to the Beacon:
Step 1: Gather An Effect Mineral
The status effects that a Beacon provides you can be manipulated by using certain effect minerals that you can find in the game. Depending on your requirements, you need to find either an Iron Ingot, Gold Ingot, Emerald, Diamond, or a Netherite Ingot.
Step 2: Access The Beacon
After you have acquired the desired effect mineral, you have to access the Beacon to make the required changes. To do this, just click on the Beacon, and you’ll be greeted with a control panel consisting of all the effects available with your Beacon.
Step 3: Choose an Effect
Now you have to select a preferred effect that you wish to receive from the Beacon.
If you’ve been doing exactly what’s stated in this guide, you should have two options available – Speed (Claw icon on the primary power section that makes you run faster) and Haste (Pickaxe icon on the primary power section that makes you mine faster.)

If you have more than just one layer in your Beacon tower, you’ll have more effects available to equip. Therefore, choose your desired effect from the ones available in your Beacon and head to the next step to proceed.
Step 4: Add The Effect Mineral
Once you’ve chosen the desired effect, you just have to add the effect mineral to the beacon by dragging the desired mineral you’ve acquired to the empty box at the bottom-right corner of the Beacon’s control panel window.
Step 5: Apply The Effects
After adding the effect mineral to the Beacon, just click on the tick mark next to the effect mineral slot to continue. This will save the changes you’ve made, and the status effect will begin working for your player.
Where Should You Place Your Beacon?
A Beacon in Minecraft is much more than just a laser beam firing in the sky. If used the right way, Beacon can provide you with various additional powers along with huge buffs that help you make several things easier near your primary base.
The secret to Beacon’s power is the pyramid that activates it. As stated above, you can have up to four levels in your pyramid, with each successive level requiring more blocks. Here’s a breakdown of the various pyramid levels to help you determine where you should ideally place your Beacon:
Single-Level Pyramid
A single-level pyramid allows you to choose from either of the two available abilities in your Beacon – the Speed or the Haste. It also has the smallest range of all, which ranges to twenty blocks in all directions. If you find it hard to gather materials for a fully-powered pyramid, this is a good start.
If you have only one Beacon, you’ll find it relatively simpler to make a single-level pyramid for it. All you have to make is a 3×3 square using nine blocks or iron. For additional Beacons, simply expand the pyramid along the rows; for instance, make a 4×3 rectangle with 12 iron blocks for two, and so on.
Two-Level Pyramid
A two-level pyramid requires a considerably larger number of resources as compared to the earlier one, but it also allows you to choose a second ability from two available options – the Resistance or the Jump Boost.
Adding another layer also increases the effective range of your Beacon by 30 blocks in all directions. To make a two-level pyramid, you have to add two more blocks to either side of your first-level pyramid, which means a pyramid with one bacon will have a total of 5×5 blocks.
Three-Level Pyramid
Adding a third layer to your Beacon pyramid adds another effect to it named Strength boost. It also increases the range of your Beacon by 40 blocks in each direction. Moreover, just like earlier, adding two blocks on each side of a two-level pyramid will make it a three-level pyramid.
Four-Level Pyramid
Being the final level for the Beacon, a four-level pyramid allows you to either choose a secondary ability named Regeneration or upgrade your existing primary abilities to level two and increase its potential effects as well.
Having a four-level pyramid also increases the range of your Beacon by 50 blocks in each direction.
Status Effects That You Can Gain from Beacon in Minecraft
There are a total of six status effects provided by a Beacon at successive levels, categorized into primary and secondary powers. Here’s a list of all the status effects that you can manage to gain from a Beacon:
Primary Powers
- Speed – Increased movement speed
- Haste – Increased mining speed
- Resistance – Reduce incoming damage
- Jump Boost – Enhance jumping capability
- Strength – Increase melee damage
Secondary Powers
- Regeneration – Restores your health
How to Change the Color of Beacon in Minecraft?
Once you activate a Beacon, it emits a strong beam of light in the sky that acts as a marker to help you navigate your way back to your base. You can change the color of this beam to mark different areas such as villages, bases, farms, and more.

Changing the color of the Beacon’s beam is quite easy too. All you have to do is place a colored glass at the top of the Beacon. Any glass can be stained with your preferred color by placing a dye in the bottom surrounded by eight blocks of glass in individual grids of the crafting table.
Final Words
So, there you have it – everything we know about Beacons in Minecraft so far. Beacons are undoubtedly one of the unique items in Minecraft that come with a lot of practical uses.
From allowing you to mark important locations to providing you with special powers, there’s something for everyone in a Beacon. Therefore, go ahead and make one for your Minecraft world right now.


