

Assemble your crew and take part in the riskiest job of the Los Santos underworld – the Doomsday Heist. The rewards are massive, and so is the adrenaline rush across the three rambled acts of mayhem.
Certain wicked outside organizations have joined forces together to devise a plan so diabolical that it could end the entire humanity.
Avon Hertz, a billionaire entrepreneur, along with his pet neural network Clifford, has found shreds of evidence related to this.
Our very own Lester Crest is responsible for assembling a team that’s badass and crazy enough to be able to do whatever it takes to bring those notorious organizations down. However, it certainly isn’t going to be a cakewalk.
To deal with this threat head-on, you not only need powerful firepower and some serious teamwork but also a snort of luck and of course, some assistance from Avon’s lethal blue-sky tactical hardware for the job.
It’s a no-brainer why the Doomsday Heist is still so popular among the community, even though several newer ones have already been added.
That being said, if you’re playing this heist for the first time, consider this guide as your one-stop reference for the same.
Read: GTA Online Doomsday Heist - Payouts
GTA Online Doomsday Heist- Walkthrough
There’s a lot of money at stake in the Doomsday Heist. Depending on the difficulty level you choose while beginning the heist, the bonus challenges you complete, and the modifiers you apply, the payout may vary.
Preparation for Act 1
- Paramedic Equipment
The objective of this prep mission is to steal an ambulance containing paramedic equipment. When you start the mission, get in a car and head to Del Perro Freeway.
There, you’ll find an ambulance near some police vehicles. Sneak your way into the ambulance.

Now, you’ll need to lose the wanted level by making the cops lose track of you. Once done, drive the ambulance back to the facility.
However, as your location will be exposed, you have to make your way back quickly before anyone gets you.
- Deluxos
In this second preparation mission for act 1, you have to find your way out through the Garage where the Deluxos are kept while evading the security guards.
To do this, you first have to drive to Steele way and locate an apartment with a lot of security around it.
Then, please take out the guards and retrieve a key dropped by one of them that will be used to access the garage.
Once you’ve cleared the area, access the garage and make sure you have equipped your weapon, as you have to kill some more enemies before stealing the Deluxos.

Soon after stealing, you’ll send a global signal, so anyone can find and kill you. So make sure you keep a fast pace, get your Deluxo resprayed in LS customs with your preferred color, and deliver it quickly at the facility.
You have to repeat the same process unless you have four Deluxos delivered to the facility.
- Akula
Akula is the third prep mission for act 1 that requires you to infiltrate a control tower at Fort Zancudo, access the control tower, take a lift to the top floor, and download the required data.
After acquiring the data, leave the base, lose cops, and go back to El Burro Heights.

Upon reaching, take down the enemies and take the Akula. You can then fly to higher ground to lose the cops easily and deliver the Akula to the facility. And as usual, you’ll send a global signal, so beware of other players as well.
Setup for Act 1
- Dead Courier
Dead Courier is the first setup mission for Act 1 that involves two teams who need to retrieve a dead agent cache and recover a stolen helicopter.
The first team needs to navigate to the LS County Coroners and then go to the Coroner’s Office to retrieve data from the laptop.

On the other hand, the recovery team has to navigate to the scouting point and steal the intel from the nearby vans.
Then, hijack a chopper to get to the Paramedics team marked on the map. After arriving, take out the police and fly above the clouds to lose cops and end the mission.
- Signal Intercepts
In the second setup mission, Signal Intercepts, you have to use a Deluxo to get near target vehicles and hack them to recover data. Take the Deluxo you collected earlier and head towards the four vans marked on your HUD.
After getting close to the vans, bring up your phone, open the SecuroServ Hack App, keep close until you have retrieved the data from the vehicles, and then blow them up using the missiles equipped on the Deluxo.

Once you’re done on the ground, head to the waters and do the same for four boats. After hacking all the vehicles, head to the LS airport and hack a plan by using the Deluxo in hover mode.
Destroy the plane after the hack is complete and deliver the Deluxo to the drop-off.
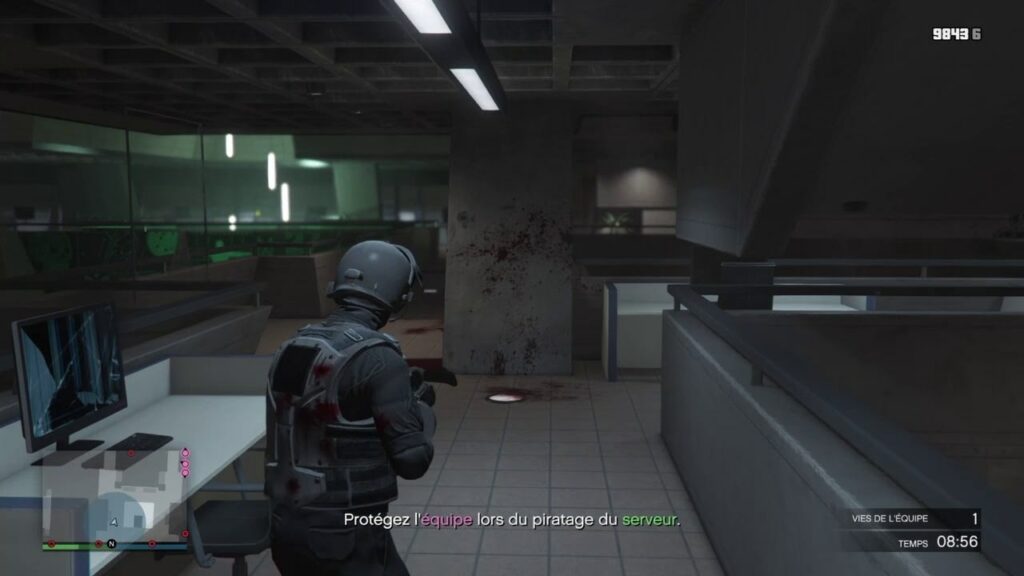
- Server Farm
Before you start the third setup mission, make sure you have a pistol equipped with a silencer and stock up on armor.
You have to land on the roof of the N.O.O.S.E Government facility and infiltrate the server farm without being detected.

After approaching the rear entrance, take down the head guard and retrieve the access codes from his body.
Inside the server farm, begin interacting with the server and complete the hack, followed by making your way to the exit afterward.
Finale Act 1 – The Data Breaches
The Data Breaches is the final mission for act one, in which you have to prevent the IAA servers from being hacked.
Head outside the facility and make your way to the IAA facility marked on the map. Then, use the surroundings as cover and take out the enemies.

You can use a Combat MG to take down the enemies, and once the area is clear, head back to the top floor and access the war room.
Lastly, take control of the gun camera and clear out the remaining enemies to bring the Heist to a close.
Preparation for Act 2
- Keycards
The Keycards is the first prep mission for the second act of the Doomsday Heist. In this mission, you have to steal a riot van that consists of keycards used to access the hangers at the Los Santos International Airport.

Get in a car and drive to Alhambea Drive where you’ll find a riot van. Take out the police in the area and make a quick escape in the riot van. Then, you have to lose the cops by either sneaking or calling up Lester.
- ULP Intel
In the ULP Intel prep mission, you have to take out the agent ULPs kidnappers and retrieve the information about where he’s abducted.
To do this, you first have to head to the enemy’s location, take them down, and head to the apartment marked on your HUD to steal a duffel bag.

Before you proceed, make sure your health bar is full and you have ample armor. You’ll have to deal with certain dealers inside and then proceed to take the duffel bag.
Afterward, make your way back to the facility while being on a global signal.
- Riot Control Van
The Riot Control Van Doomsday Heist prep mission requires you to start a riot and wait for private security to respond to the situation with a riot control van.
Head to the Strawberry Plaza marked on your map, and throw tear gas into the crowd upon reaching.

Then, initiate a fight with the rioters. An RCV will arrive to deal with the situation, and as soon as the cops get out of the van, take them out.
After this, take control of the riot van and drive back to the facility while evading the police to complete the mission.
- Strombergs
The “Strombergs” prep mission requires you to locate and steal trucks carrying some wrecked Strombergs and deliver them to the facility.
You’ll find various trucks marked on the map, out of which one is the Stromberg. Once you find it, kill the driver and steal the truck.

Then, repeat the same process unless you have collected three more trucks. However, keep in mind that if you play it solo, you’ll find it hard to manage time, so be sure to do everything as quickly as possible.
- Torpedo ECU
In the fifth prep mission for the Doomsday Heist, the Torpedo ECU, you have to assault a barge iff the coast and successfully steal the torpedo electronic control units from the arms dealers. First, head over to Chumash and steal a Jet Ski.

Then, take out the enemies from a safe distance, and once the way is clear, board the barge and steal a duffel bag. Like always, a global signal will be sent to consider delivering the Torpedo quickly back to the facility.
Setup for Act 2
- Avenger
Avengers is a simple setup mission for the second act that requires you to access a Hangar at Los Santos International Airport and steal the Avenger Aircraft owned by Merryweather. When you reach the airport, quickly take cover by the boxes near the entrance.

After that, take out the enemies on the left and head to the top floor to turn on the generators. On all levels of the hangar, you’ll have to clear out enemies.
Once done, return to the ground floor, access the Avenger, and fly it to the back marked on the map.
- Rescue ULP
The Rescue ULP setup mission involves two teams – one needs to assault the foundry to rescue Agent ULP, and the other needs to provide cover from a vantage point.
The ground team has to go to Grand Banks Courtyard, and head over to Agent ULP marked on your map.

On the other hand, the Lookout Team has to drive to the Grand Banks Courtyard and head to the vantage point.
Then, you have to take out incoming enemies while your teammates are in the foundry. Once Agent ULP is rescued, take him to the dropoff to finish the mission.
- Salvage Hard Drives
In this third setup mission for the second act, you have to use the water cannons on the riot control van and prevent the Russian agents from destroying the stolen hard drives.
To do this, head to the Stoner Cement Works and put the two trucks on fire using the RCV.

Then, you have to head over to La Mesa and put three more trucks on fire. If you lose too much of your health while putting the trucks on fire, back off and replenish your health first before proceeding, as you’ll have to take a lot of damage.
Next, you have to head to Cypress Fkats and take out four more trucks using the RCV. Lastly, you have to head to the final location at the Elysian Island, take out five trucks, and take down the enemies acquiring the hard drives to finish the mission.
- Submarine Recon
The Submarine Recon setup mission requires you to use the strombergs you stole to destroy a convoy and head underwater to scan the submarine. Head over to North Chumash and use the missiles to destroy the convoys.

Once done, go into the water and use the torpedos to destroy the sea mines. At last, scan the submarine by being close to it.
Then, return to the land and deliver the Stromberg to the drop-off to finish the mission successfully.
Finale Act 2 – The Bogdan Problem
The Bogdan Problem is the second act for the finale that requires you to alincg an operation on a foreign submarine lurking off the coast.
There are two teams, out of which, one board through the airlock to disable the sub while the other holds off the enemy agents.

The submarine team has to take the Stromberg and head to the submarine and take out the enemies. Then, you have to speak with the contact locked up on the bottom floor and take a picture of the intel table.
The Air Support team, on the other hand, has to drive to the Avenger marked on the map, acquire it, and fly over the submarine.
Engage autopilot on the plane and destroy the incoming enemies until your teammate has expired the submarine.
Preparation for Act 3
- Marked Cash
In this prep mission for the third act, you have to steal a duffel bag of marked bills from a dead drop who the FIB is watching.
First, head to the Strawberry Station and walk behind the ticket machine to steal the duffel bag.

Just collect it and lose the cops before returning to the facility to complete the mission.
- Recon
The Recon prep mission requires you to head to the Pacific Allied Shipyard and take some photographs of the area before proceeding with the deal.
Keep an eye on the minimap and wait for the camera icon to turn blue before taking the shot.

After sending the pictures to Lester and leaving the area, the mission will be completed.
- Chernobog
The premises of the Chernobog prep mission are quite simple – all you have to do is steal a Chernobog ballistic missile launcher from Merryweather Security.
Head to the Merryweather camp and take out the enemies, and then steal the Chernobog.

Once done, drive back to the facility while outwitting Merryweather agents. Safely deliver the missile launcher to finish the mission.
- Flight Path
In the Flight Path mission, you have to eliminate an arms dealer to recover information from the barrage ATV flying into Los Santos.
Head to San Andreas Avenue and collect the briefcase from the location marked on the map, then return to the facility.

- Test Site Intel
The Test Site Intel is a fun setup mission that requires you to retrieve the test site location of the Khanjali Tank.
To do this, you have to head to Inesenso Road and take out the enemies guarding the house before heading inside and opening the lockbox in the center of the room.

Once done, exit the building and quickly get back to your facility in a vehicle. Make sure you lose the cops, and like always, beware of other players due to the global signal.
- Onboard Computer
Being the last prep mission for the final act, the Onboard Computer assigns you the task of shooting down a prototype hydra and heading to the crash site to recover the enemy’s broadcast signal. First, head to Fort Zancudo to steal a jet.

After acquiring the jet, fly over to the Hydra marked on your map and deal damage to it using the machine guns.
Once it crashes, head over to the crash site, search the cockpit to collect a module and return it to the facility to finish the mission.
Setup for Act 3
- Rescue Agent 14
As the name suggests, the Rescue Agent 14 setup mission for the third act needs you to navigate to the Pacific Allied Shipyard and try to purchase Agent 4 from Merryweather Security. Find Agent 14 behind a crate and activate the thermal mission to see the juggernaut’s location.

Then, work your way across the Shipyard and make sure one of your teammates is always near Agent 14 as he attempts to get killed by running in front of the Juggernauts. Lastly, get into the helicopter with Agent 14 and make your way to the drop-off.
- Escort ULP
In the Escort ULP setup mission, you have to use the Chernobog to protect and escort Agent ULP and help him escape.
Take a car, drive to Paleto Bay Construction Yard, and clear the security team. Then, hand over the Chernobog to one teammate and a car to the other.

Afterward, take Chernobog to the landing site and wait for Agent ULP to fly past. Now you have to follow Agent ULP to the landing point while taking out any enemy helicopters that attempt to prevent Agent ULP from escaping.
- Barrage
Barrage is the third setup mission for the final act, which requires you to intercept an arms dealer air convoy and then destroy a heavy-lift helicopter to recover the Barrage ATV.
After starting the mission, head to the ambush point marked on the map and shoot down all the choppers.

After the crash, drive to the crash site and steal the Barrage, then drive to the Sandy Shores Airfield while your teammates are defending the turret.
Then, destroy the enemy aircraft and deliver the Barrage to the dropoff to finish the mission.
- Khanjali
In this mission, you have to destroy a supply of enemy weapons at a scrapyard located in the Grand Senora Desert and steal the Khanjali tank.
To do this, head to the Aircraft Scrapyard and use sticky bombs to destroy the enemy equipment.

After destroying the equipment, steal the Khanjali by following the wall around, climbing over the fence, and entering the tank.
Wait for your teammate to enter the tank and head to the drop-off while destroying the enemies to complete the mission.
- Air Defenses
The Air Defenses is the last setup mission for the Doomsday heist, after which you can begin with the final act.
In this mission, you have to use a Volatool Jet and destroy certain SAM turrets located around Mound Chiliad.

Get in a car and drive to Sandy Shores Airfield to take control of the Volatol jet. Then, travel to Mount Chiliad and destroy 12 turrets scattered all over the location.
Make sure you don’t take too much damage and finally deliver the Jet to the airfield to bring the mission to an end.
Finale Act 3 – The Doomsday Scenario
The Doomsday Scenario is the last act of the Heist that shows a Missile Launch Base being fallen into the wrong hands. You have to storm the base, clear the enemy hoards, stop the warhead from launching, and successfully save the day.
First, drive to Grapeseed, marked on your map, and choose whether you want to proceed with Khanjali or Barrage.
Then, you have to race down to the tunnel while avoiding the enemies trying to block your path and destroy five supply crates hidden across the tunnel.
After destroying all the supplies, head towards the control tower and watch out for Juggernauts on your way.
Defend your teammate while they are hacking into the server, and then head to the top floor to interact with the Orbital Cannon.
Then, position the cannon over the trucks and shoot them down. Now, navigate to the silo marked on your map and once you reach there, follow Avon using a jetpack and shoot the helicopters before taking down Avon. Travel back to the laboratory at last to finish.
Final Words – Doomsday Heist Walkthrough
We hope this guide has been helpful in teaching you how to complete the Doomsday Heist and that it helps you get to grips with the mechanics and strategies of this Heist in particular.
Hopefully, that helps you get up to speed with everything Doomsday Heist-related.


